Tuesday, December 6, 2011

Descriptive Chart for our Unknown

Here is the culmination of every property we tested and identified for our Unknown:

Morphological Characteristics:

  1. Cell Shape: Cocci
  2. Arrangement: Staphylococcus (clusters)
  3. Size: small
  4. Spores: none
  5. Gram Stain: Gram-positive bacteria
  6. Motility: non-motile
  7. Capsules: none
  8. Special Stains: none
Cultural Characteristics
  1. Colonies: circular, opaque, cream colored, entire, rigid, and flat
    • Nutrient agar: growth
    • Blood agar: N/A
  2. Agar Slant: growth
  3. Nutrient Broth: growth
  4. Gelatin stab: non-motile, grows where pin is inserted
  5. Oxygen requirements: facultative aerobe
  6. Optimum temperature: 37 degrees Celsius
Physiological Characteristics
  1. Fermentation
    • Glucose: Fermentation
    • Lactose: Fermentation
    • Sucrose: negative; no fermentation
    • Mannitol: growth occurs; no fermentation
    • MacConkey: no growth 
    • EMB: no growth
    • Litmus: formation of an acid curd; litmus reduction
  2. Hydrolysis
    • Gelatin Liquefaction: negative
    • Starch: negative
    • Casein: negative
    • Fat: positive
  3. IMViC
    • Indole: negative
    • Methyl Red: positive for acid production and fermentation
    • Voges-Proskauer: negative
    • Citrate utilization: negative
    • Nitrate reduction: positive
    • Urease: positive
    • Catalase: positive
    • Oxidase: negative
    • TSIA: acid slant with alkaline butt
  4. Litmus Milk
    • Acid: ferments lactose into an acid
    • Alkaline: none
    • Coagulation: acid curd
    • Reduction: reduces litmus
    • Peptonization: N/A
    • No change: N/A
Using these characteristics we were able to narrow down the identity of our bacteria through use of a flow chart.  
  1. First, we identified that the bacteria was "Gram-positive."
  2. Then we identified it as cocci (not bacillus, etc.)
  3. After, we referred to the Catalase test.  Because the test was positive, our bacteria is either from the Micrococcus spp. or Staphylococcus spp.
  4. Next we referred to our Mannitol test and recalled that we tested negative for fermentation.  This narrowed the list to S. saprophyticus, S. epidermidis, M. luteus, and M. varians.
  5. Because there was no pigment surrounding our bacteria in the Mannitol test, we limited our list to S. epidermidis and S. saprophyticus.
  6. We are unable to identify our bacteria any further.  To completely identify our bacteria a fructose test needs to be completed.

Tuesday, November 29, 2011

Food Purity

Welcome back! The results are in for the food purity testing!


Antibody-Antigen Reaction in Agar:


Antigen-Antibody Reaction on right, Food Purity test on left.


Antigen-Antibody Reaction:

Recall from the last blog that this test was conducted with Bovine Albumin, Goat Anti-horse Albumin, Goat Anti-bovine Albumin, and Goat Anti-swine Albumin.  Notice the white  cloud surrounding the well farthest right in the picture above.  In this well was Goat Anti-bovine Albumin.  This reacted with the Bovine Albumin to form the cloud.  The bovine antigen placed in the center well reacted with the bovine antibody.  It did not react with the others because a bovine antigen will clearly not bind with a swine or horse antibody.  If a different antigen were present (such as that of a horse or swine) the reaction would have occurred with the horse or swine antibody respectively.

Testing for Food Purity:


In this test we filled four wells with the following solutions: hamburger extract, Goat-Anti-horse Albumin, Goat Anti-bovine Albumin, and Goat Anti-swine Albumin.  The purpose of the test was to indicate food purity based on the reactions that take place within the medium.  Ideally, only bovine (the meat found in hamburgers) should be present in the hamburger meat extract.  If this is the case, a cloud should only form around the Goat Anti-bovine serum.  However, if the meat is not pure, a reaction would occur between the hamburger meat and the other Anti-serums.  This could occur during cross-contamination in a slaughterhouse.  Thankfully, there was only a reaction between the hamburger extract and the Goat Anti-bovine Albumin.  This proves that the hamburger meat is pure and no contamination is present.

Thanks for a great lab Dr. P! :)

Tuesday, November 22, 2011

Bacterial Growth, ELISA, and Food Purity

Welcome back! Today was an exciting day filled with interesting surprises.  First, let us examine the results of our wonderful bacteria!


The Results Post- cryo protection:


As you can see from the picture above, the environmental bacteria, after incubation, displayed a great deal of growth.  You can compare the bacteria with the one in previous blogs: the color, colony formation, and characteristics are identical!  This proves that cold is a good method to preserve bacteria.  Also, note how the bacteria on the bottom of the picture is growing rampant.  However, it is important to notice that it is not growing in the presence of our bacteria, on the top of the picture.  This indicates that one of the two bacteria has an antibiotic property.


ELISA

This test uses the theory of how antigens and antibodies react in order to test for the presence of the HIV virus in different samples (1,2,3, and 4).  An antigen is an antibody generator.  It is a protein, a carbohydrate, (etc.) that signals the production of antibodies when an unidentified substance is present within the body.  The antibodies are created to kill the antigen present; they also remain within the body to kill the antigen if it is ever present in the body again.  IN FACT, this is how vaccines work!  Vaccines dump huge amounts of antigens into the body. Then, the body creates antibodies against them.  Once this production takes place, the person no longer has to worry about getting the specific illness (unless, of course, the virus mutates) because the body now has a set of antibodies to fight it off.


As stated previously, the ELISA uses antibodies to detect the presence of HIV virus.  Antibodies are present within a specific serum.  The HIV antigen (GP 120) is reacted with the antibody serum provided in the experiment.  After, a sheep enzyme is also added.  This enzyme binds to Human Ab (a human antibody) creating a blue color.  This color appears because there is a blue substrate attached to the sheep enzyme that is visible when it reacts with Human Ab.

The procedure:

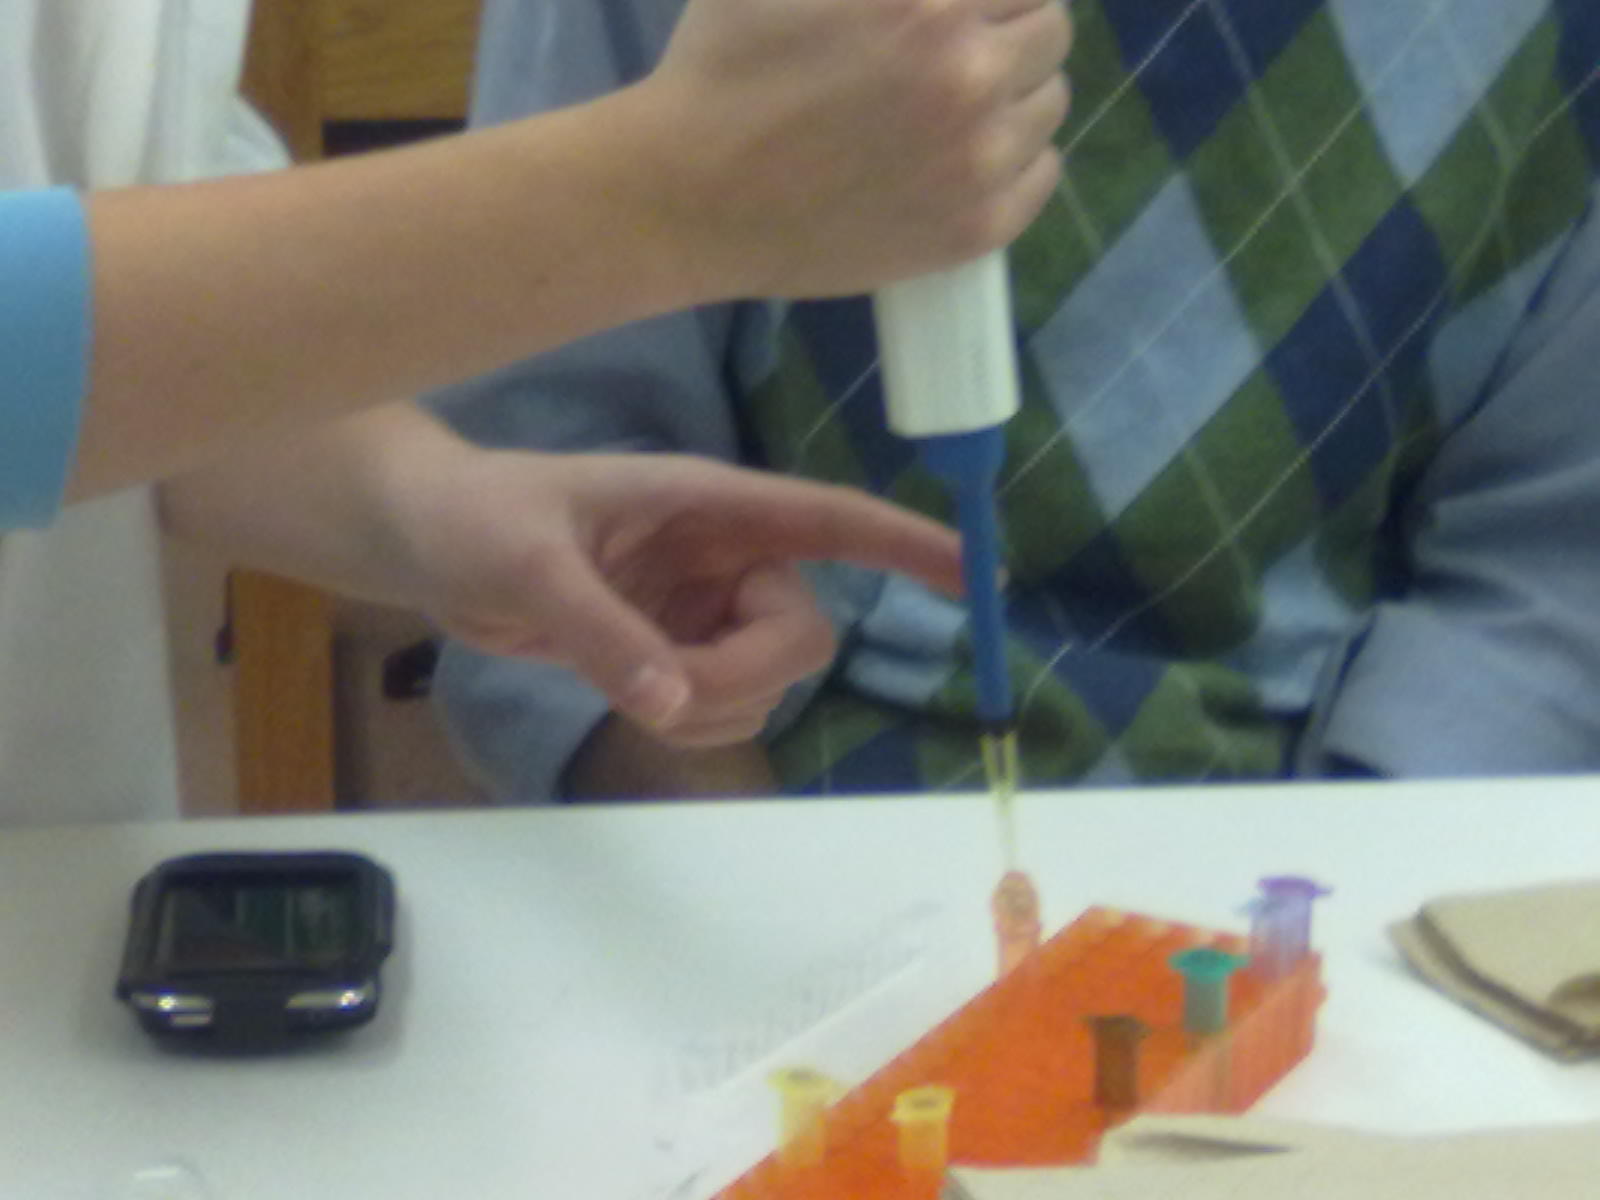
1. To execute this experiment, first we added 15 micro liters of the antigen to each of the wells using a pipet.

2. After letting the antigen sit for 5 minutes, we dumped out the solution and patted the wells dry on a stack of paper towels.  After, we used a pipet to add wash buffer to each of the wells.  We dumped the buffer out and patted the wells dry with paper towels once again.  This procedure was executed twice.

3. After, we added the antibody serums!  In the first 3 wells, we added 50 micro liters of positive control.  In the next 3, we added 50 micro liters of a negative control to each well.  These were used to compare the results with our unknowns (1,2,3, and 4).  Finally, 50 micro liters of 1,2,3, and 4 were added to wells 7,8,9, and 10 respectively.

4. These were then left to sit for 5 minutes; after, we used the wash buffer again, executing the same procedure for washing found in step 2.

5. Next, 50 micro liters of the secondary antibody was added to each of the wells.  After sitting for 5 minutes, they were also rinsed using buffer solution (using the same procedure found in step 2).

6. Finally, we added 50 micro liters of the substrate into each of the wells. If a blue color appears the test is positive for the HIV virus.

The results:
 
Luckily, only the positive control had a blue color present.  This means that none of the unknowns (1,2,3, and 4) have the HIV virus within them.  How does this work?  The blue color appears when the secondary antibody binds to the Human Ab antibody.  Human Ab is a component of the HIV virus (along with an antigen).  Because the HIV virus was not present in the samples, the secondary antibody had nothing to bind to. Thus, the blue substrate could not be released.

Food Purity

This next exercise was a "technique of immunology" that we used to test for food purity.  To do this we had to make numerous wells in the agar plate provided.  We then filled them with various solutions to see how the substrates would react with one another.


Antibody - Antigen Reaction in Agar:

We had to make wells in the agar medium and fill them with selected solutions.  In this experiment, we made 4 wells that were placed in a "Y" formation.  The 4 solutions were 1) Bovine Albumin, 2) Goat Anti-horse Albumin, 3) Goat Anti-bovine Albumin, and 4) Goat Anti-swine Albumin.  A white line will appear if the samples react with each other. We will observe this in the next lab.

Testing for Food Purity: 

This test can be used to determine food purity in hamburger meat.  A raw hamburger extract was made for our experiment.  It is going to be tested with Goat Anti-horse Albumin, Goat Anti-bovine Albumin, and Goat Anti-swine Albumin.  Depending on the results of the reaction, we will be able to determine if the meat is contaminated (based on the reactions with a particular antibody).


Join us next time for results!

Thursday, November 17, 2011

The Yogurt! and the Frozen Environmental sample!

Welcome back! As you can see by our title, the yogurt was a success!  Although, some people wouldn't say so!  Let's see what we found!

The Yogurt:


From left to right: The yogurt prepared with Kefir, The yogurt prepared with a preexisting yogurt with active cultures.

Both methods resulted in fermentation: yielding yogurt.  The general consensus was that the yogurt prepared with Kefir had a more natural (slightly sweet) taste, and the yogurt prepared with the active cultures was very tart.  If you are wondering what happened to the control, it curdled.  Nobody was able, or willing, to taste the milk product.

Yogurt results when the active cultures of bacteria ferment the milk!!

UV Light:
Personal Sample:


From left to right: Bacteria "F" (ours) and Bacteria "K."

Growth was prominent on both the UV exposed and the controlled portions of this plate.  This was evident in the majority of the class's samples.  We concluded that this was a result of experimental error due to inadequate exposure to the UV light.  With longer exposure time, we believe that the growth of the bacteria exposed to UV light would be affected.

Steripen Water Sample


From left to right: control bacteria sample, UV light (Steripen) treated sample

As evident from the picture above, the Steripen can be put to good use when traveling to third-world countries.  It is very useful for treating water samples.  The UV radiation hindered the majority of bacterial growth, with only a few colonies remaining after treatment.

The Environmental Sample... REVIVED!


Recall from previous blogs that we stored a small sample of our Environmental broth before sending it away to the autoclave.  This bacteria sample was then stored at -80 degrees Celsius for approximately two months.  If the bacteria was preserved correctly, by cryoprotection, the bacteria should still grow!

After retrieving the sample from the freezer we made a streak plate of the bacteria and placed it into the 37 degree incubator.  If there is growth next class, the bacteria survived!  This was the purpose of the experiment.  This technique for saving bacteria is used by professionals in the laboratory.

Join us next time for growth!

Tuesday, November 15, 2011

Yogurt and UV Light!!

Today, since we had already identified our bacteria, we experimented with UV Light (how it applies to everyday clinical situations) and learned how to grow yogurt.

UV LIGHT


First, in order to test UV Radiation's effect on bacteria, we made a streak plate of our identified sample. After streaking the plate we placed the uncovered dish under a UV Light, half of it covered with an index card and the other bare to take in the radiation. The glass lid could not have been kept on because glass (and even the note card) does not allow the UV Rays to pass through. After the culture was positioned under the light we used long wave UV Light, also known as UV Light C, to radiate the bacteria sample for 30 seconds.


After radiation the sample was placed into the incubator for further inspection next lab. We conducted this experiment since UV Light is becoming a clinically acceptable method to reduce the number of microorganisms in a hospital setting. We are going to see if this UV Radiation hinders the growth of our bacteria.

STERIPEN UV LIGHT PURIFIER


The purpose of the Steripen UV Light Purifier is to reduce the amount of bacteria in drinking water, which is often used by people visiting third-world countries. We tested the capability of the Steripen to purify water mixed with bacterial cultures in our lab.

First, we mixed the bacteria (using the aseptic technique of course) with a pipet into a beaker filled with distilled water.


Dr. Joseph asked specifically for us to put in this picture -- demonstrating the older technique of mixing the bacteria and water with a manual pipet. ;)

After mixing the bacteria we sterilized a glass stirring rod with isopropyl alcohol and flame.


Although some students looked mildly frightened, there was nothing to fear. This technique is 100% effective and depending on the person performing it, 100% safe. The rod was used to make a streak plate  of the water to compare with the results of the Steripen. After isolating the bacteria without the UV Light Treatment, we treated the water with the UV Light.


After the allotted time, we created another streak plate to compare with the first. Is the bacteria gone? We'll find out next class!

MAKING YOGURT


In order to form yogurt you need milk and another probiotic substance (yogurt with active cultures or Kefir, a probiotic liquid). First, we poured milk into a bowl and placed it into the microwave for 5 minutes to boil.


It is important to let the milk boil and froth until it flows over the sides of the container. After pulling it out of the microwave, it is important to let the milk cool. In our case we let it cool to 37 degrees Celsius. Don't be surprised if a film layer appears at the top of the milk, this is the fat separating from the milk.


We then separated the milk into three cups. One was a control, one was mixed with yogurt containing active cultures, and the final was mixed with Kefir.


Then we placed these samples into the incubator until next class when we will check them for growth. Growth = Delicious Yogurt!!!

Good thing it was around lunch time, because after all this microbe cooking we sure were HUNGRY! Join us next time for food and microorganisms!

Thursday, November 10, 2011

"F" revealed!

Today was an exciting day in lab! After extensive testing, we finally realized the identity of "F"!

Urea Hydrolysis Test: 


Recall from the previous blog that this broth was a orange/yellow color. As evident now, this broth is now a bright magenta! This color change means that our test was positive for the presence of the enzyme urease. The color change occurred because of the ammonia product in result of the reaction.

Indole (Tryptophan Degradation) Test


After the incubation period, we added 5 drops of Kovac's Reagent to the broth.


If our bacteria was able to break down the amino acid Tryptophan, indole would be one of the three biproducts. To see if indole is present it is necessary to add Kovac's Reagent. If a red layer quickly appears on the top of the tube, indole is present. Since this did not happen in our broth, "F" tested negative for the enzyme Tryptophanase and cannot break down this amino acid.

Nitrate Reduction Test


After incubation we added 5 drops of sulfanilic acid and 5 drops of dimethyl-α-napthylamine. 


Since there was a red color change within the broth, nitrate has been reduced to nitrite. This proves that our bacteria has the enzyme nitrate reductase. Even though our bacteria tested positive, we were instructed to add Zinc to the broth, for extra assurance. 


Since our broth continued to deepen in red color, this helped to prove that our bacteria had the presence of nitrite. If there was no color change, ammonia would have been present. 


Citrate Utilization Test


Recall from the last blog that the agar in this tube was green prior to incubation. Since there was no color change our bacteria does not have citrate permease and therefore cannot utilize citrate as a source of carbon and energy. 


Oxidase Test


This test is designed to determine if a certain bacteria has the enzyme cytochrome oxidase. Cytochrome oxidase collects electrons at the end of the ETC in aerobic respiration. When adding a reagent known as N, N, N, N tetramethyl-p-phenylenediamine, cytochrome oxidase is detected by a color change. If a deep purple color is present at the end of the reaction within 10 seconds, the test is positive. If it is positive after this it is due to the oxygen in the air. 


As seen above, our bacteria tested negative since it had no color change. 


Antibiotic Spread Plate: 


Although it was difficult to see growth, there is some bacterial growth underneath the center antibiotic disk. Since there was no growth throughout the entire plate, our bacteria proved to be sensitive to a wide variety of antibiotics including Penicillin, Vancomycin, Novabiocin, Tetracycline, and Chloramphenical. It was not completely sensitive but had an intermediate sensitivity to Erythromycin and Neomycin. Sensitivity was determined by measuring the diameter of the area without growth surrounding a particular antibiotic disk. This area is called "Zone of Growth Inhibition". This area differs for each particular antibiotic and is calculated in millimeters. 


Laboratory Differentiation of Streptococci


There are many different groups of streptococci bacteria. Group A consists of S. pyogenes. As seen above this bacteria is extremely sensitive to many antibiotics including Penicillin, Bacitracin, and Vancomycin. However, it is not sensitive to Neomycin. We know it is sensitive to these antibiotics due to the bright red color surrounding the three antibiotic disks. This bright red color indicates that the red blood cells in the blood agar were not lysed as a result of S. pyogenes. Next time you get Strep have no fear! It is essentially sensitive to every antibiotic!


and now a drumroll please...the moment you have all been waiting for... THE IDENTITY OF "F"!


To determine "F" we had to go back to the beginning: the staining process. Recall that during the gram staining procedure "F" took a purple cocci appearance. Because of this we know that "F" is both gram positive and cocci. After we referred to the catalase test, where "F" tested positive for the enzyme catalase. Because of this we know that "F" cannot be of the Streptococcus genus. Catalase is found in two main cocci genuses: Staphylococcus and Micrococcus. Because of this, we referred to the Mannitol Salt Agar test. Our bacteria tested negative for fermentation during this test. Recall that we previously noticed that there was no green sheen surrounding our bacteria when it was growing on the salt agar, proving that it could not ferment Mannitol. This negative result provoked us to believe there were then 2 possible identities. We now know that our "F" is Staphylococcus epidermidis  or Staphylococcus saprophyticus. Because we did not complete a Fructose test during our experiments, we are unable to identify "F" any further. 


It's been grand, but don't leave us just yet! Join us next week for an exciting new Environmental Project! A true scavenger hunt of the world unseen!   

Tuesday, November 8, 2011

Final Testing!

Today in lab we prepared the final tests for determining the identity of "F". We also were able to work with antibiotics for the first time! Read on for the exciting procedure!

Citrate Test: 


The purpose of this test was to determine whether our bacteria uses citrate as its sole carbon and energy source. This can be determined by the green medium turning to a blue color. If this happens our bacteria is able to break down citrate into pyruvate and carbon dioxide. We inoculated "F" using the inoculating loop, while utilizing the aseptic technique. We then placed it into the incubator until further instruction.


Indole (Tryptophan Degradation) Test: 


The purpose of this test is to determine if our bacteria can split the amino acid Tryptophan. If our bacteria can split this amino acid, yielding pyruvate and indole, a red layer will form at the top of the broth. This indicates the presence of indole. As usual, in order to prepare the sample we inoculated the broth using the aseptic technique and proceeded to put the culture into the incubator until next class.


Nitrate Reduction Test: 


The purpose of this test is to determine if our bacteria has the enzyme nitrate reductase. This enzyme reduces nitrate ions to nitrite ions and nitrogen gas. We prepared by inoculating the sample with aseptic technique and placing it in the incubator.


Urea Hydrolysis Test: 


The purpose of this test is to test for the presence of the enzyme urease. If this enzyme is present urea will be converted into carbon dioxide and ammonia. The presence of ammonia raises the pH changing the color of the broth from dark yellow to a bright pink color. We prepared this using aseptic inoculation techniques and placing it into the incubator until next lab.


After finishing these tests we created a new slant in order to have a sample to test for the presence of oxidase in our bacteria next class. Then we proceeded to make a streak plate to test "F"'s response to certain common antibiotics.


When streaking the plate we used a certain procedure, making sure that every part of the plate was covered with bacteria. We had to streak in multiple different directions, using this model:


This picture was taken from Techniques in Microbiology: A Student Handbook. After streaking the plate, we carefully placed each of the types of antibiotic discs onto the freshly streaked agar plate. The antibiotics used include:
- Penicillin
- Vancomycin
- Novabiocin
- Tetracycline
- Erythromycin
- Chloramphenical
- Neomycin

These antibiotics attack different structures and processes of the bacteria. Penicillin and Vancomycin attack the cell wall. They only attack bacteria because a bacteria's cell wall contains Peptidoglycan. However, Novabiocin attacks nucleic acid synthesis. The last four attack protein synthesis in 30S and 50S ribosomes. Since all of these antibiotics attack different structures and processes, they are selective to certain bacteria. This test will help us to decipher which bacteria "F" could be!

Join us next blog for the exciting results of these tests!